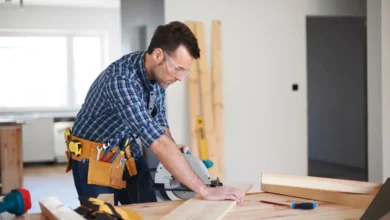
Most homeowners put off repiping for years. Not because they doubt it needs doing, but because they picture a week of chaos: walls torn open, no running water, dust everywhere, and a house that looks like a renovation war zone when the plumbers leave.
That picture is almost always wrong.
A properly managed whole-house repipe on a standard Houston home takes one to two days. Water is typically restored the same evening. And if your contractor handles drywall and paint as part of the scope, the access holes disappear too. The problem is that very few homeowners know what the process actually looks like from the inside, so the fear of disruption fills the gap.
This walkthrough closes that gap. Step by step, from the first phone call through the final coat of paint, here is exactly what to expect.
Step 1: The Initial Site Visit and Assessment
Before any pipe gets touched, a crew needs to understand what they are dealing with. That means a physical walkthrough of the home, not just a phone quote.
During the site visit, the plumber will check the existing pipe material, gauge the layout of your water distribution system, count fixture connections (toilets, sinks, showers, hose bibs, appliances), and identify access points. In Houston homes built before 1990, the most common finding is corroded galvanized steel or aging copper that has started to pit and scale internally.
The fixture count matters because experienced repipe specialists price projects based on the number of connections, not the square footage of the home or the neighborhood it sits in. That per-fixture model protects homeowners from vague estimates and geographic price markups that are common with generalist contractors.
At the end of the visit, you should receive a clear written scope with a fixed price. If a contractor cannot give you that after a site visit, that is a red flag worth taking seriously.
Step 2: Permits and Scheduling
Repiping is not a permit-optional job. In Texas, replacing the water supply lines throughout a home requires a plumbing permit, and the work must be inspected by a licensed municipal or county inspector before walls are closed up.
A reputable crew will pull the permit before the project starts, not after. This step protects the homeowner in two important ways. First, it ensures the work is inspected and on record, which matters if you ever sell the home or file an insurance claim. Second, it confirms your contractor is licensed to do the work in the jurisdiction.
Scheduling typically happens within a few days of the estimate. Most crews will give you a start date, a realistic timeline (usually one to two days for a three to four-bedroom home), and a basic list of what to do before they arrive, clear under-sink cabinets, move valuables away from walls, and ensure the crew has access to all areas including the attic if lines run overhead.
Step 3: Day One Morning Shutdown, Layout, and Access
On the morning of the repipe, the crew arrives early and the water gets shut off at the main. This is the moment homeowners dread most, but the actual downtime is shorter than expected. Most crews restore water pressure the same evening after pressure testing is complete.
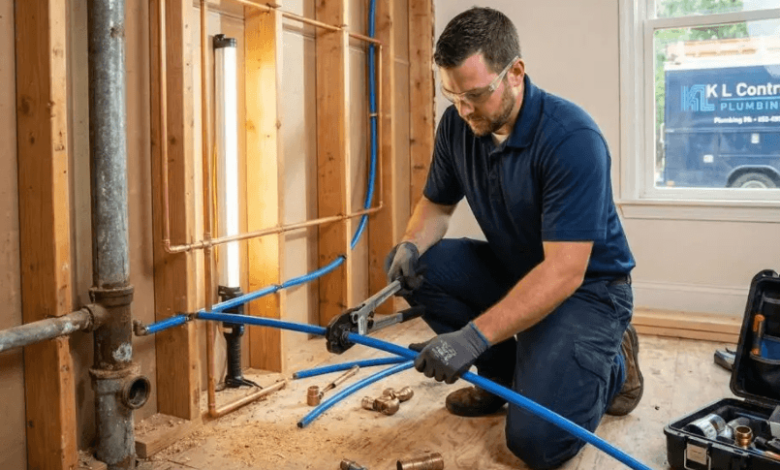
The first task is mapping the run of new pipe. In most Houston homes, PEX-A lines are routed through the attic and down interior walls to each fixture. PEX-A, the material specification used by brands like Uponor, is preferred for residential repiping because of its flexibility, its ability to expand slightly under stress rather than crack, and its long-term resistance to scale buildup inside the pipe wall.
Access holes are cut at strategic points: typically small rectangular cuts near each fixture connection and occasionally at mid-wall anchor points. The holes are not random. An experienced crew cuts the minimum needed to run and connect the new lines, which directly affects how much drywall work is needed afterward.
What the Crew Is Actually Doing Inside Your Walls
The new PEX-A lines are fished through the wall cavity from the attic entry point down to the fixture location. Each line is secured with pipe clips or standoffs to prevent movement noise. At the fixture end, brass fittings are installed using an expansion method (with PEX-A, the pipe is expanded, the fitting is inserted, and the pipe shrinks back to grip the fitting tightly no soldering, no flame, no flux).
Old pipe is either removed where accessible or capped and abandoned in place where removal would cause more disruption than it is worth. The crew will tell you upfront which approach they are taking and why.
Step 4: Pressure Testing Before Anything Closes
This step is non-negotiable and it is what separates a properly completed repipe from one that is just technically finished.
Once the new lines are run and all fixture connections are made, the system is pressurized (typically to 150 PSI or above, depending on local code) and held for a set period. Every connection is checked for any pressure drop. If a reading changes, the crew traces and fixes the issue before closing anything up.
This is also the stage at which the permit inspector may visit, depending on the municipality. In Harris County and the surrounding Houston metro area, inspection timing varies by jurisdiction, but the permit requires documented sign-off before the walls are permanently restored.
Only after the pressure test passes does the restoration phase begin.
Step 5: Drywall Repair and Wall Restoration
This is the phase that separates contractors who do a complete job from those who leave you with a punch list of holes to sort out yourself.
The access cuts made during the repipe need to be patched, textured to match the existing wall surface, and painted. In older Houston homes, wall textures vary widely: orange peel, knockdown, skip trowel, and smooth finish are all common. Matching the existing texture is a skill in itself, and getting it wrong leaves visible patches that are obvious under raking light.
Professional drywall repair as part of the repipe scope means the contractor is responsible for the finished look of the wall, not just the mechanical work behind it. That typically involves:
- Installing backing or a patch panel in the cut opening
- Applying joint compound in multiple passes with sanding between coats
- Replicating the original wall texture using spray or hand techniques
- Priming and painting to blend with the surrounding surface
If you are getting quotes and a contractor does not include drywall and paint, factor in the cost and coordination of hiring that separately before comparing prices. It is a real cost that often gets overlooked.
Step 6: Final Walkthrough and Warranty Documentation
Once the walls are restored and the paint is dry, the crew should walk the home with the homeowner. Every fixture gets tested: hot and cold at each faucet, shower pressure, toilet fill, appliance supply lines. Any concerns are addressed before the crew leaves.
At this point, you should receive:
- Permit documentation confirming the inspection passed
- Written warranty information (a transferable lifetime warranty on the repipe itself is the standard to ask for)
- Contact details for any follow-up questions
The transferable warranty matters more than most homeowners realize. If you sell the home within a few years, being able to hand the buyer a lifetime warranty on the plumbing system is a concrete, documentable improvement that supports your asking price and reduces the chance of plumbing issues derailing the transaction.
Key Takeaways
- A whole-house repipe on a standard Houston home typically takes one to two days, with water restored the same evening after pressure testing
- Access holes are cut strategically and kept as small as possible, the number depends on the home’s layout and fixture count
- Pressure testing to code is a required step before any wall is closed, not an optional add-on
- Drywall and paint restoration should be included in the repipe scope, not treated as a separate project you coordinate yourself
- A transferable lifetime warranty on the repipe work is the benchmark to look for when evaluating contractors
FAQ
How long will I be without water during a repipe? Most crews restore water pressure at the end of the working day once pressure testing is complete. The total downtime on a typical project is around five to six hours, not days. You will not need to move out or book a hotel.
How many holes will be cut in my walls? The number depends on your home’s layout, the routing of the new lines, and the number of fixtures. Experienced crews cut the minimum necessary, typically small rectangular access points near each fixture and at routing transition points. Your contractor should be able to give you an approximate count during the site visit.
Do I need to be home during the repipe? It helps to be available on the first morning and during the final walkthrough, but you do not need to stay home the entire time. Most homeowners leave for the day and return in the evening when water is restored and the crew has finished.
Will the patched walls be visible after the repair? When the texture matching and paint work is done correctly, the patches should be nearly invisible under normal lighting. The key is whether the contractor can replicate your existing wall texture accurately, which is why it is worth asking to see examples of their drywall restoration work before committing.
What pipe material is used in a modern repipe and why does it matter? Most repipe specialists today use PEX-A for residential water supply lines. Among PEX types, PEX-A (produced using the Engel method, as used by Uponor) offers the highest flexibility and the best resistance to stress cracking. It does not corrode, does not scale internally the way galvanized pipe does, and does not require soldering, which removes one of the common failure points in older copper systems.
See also: How AI Deployment Tools Are Revolutionizing Businesses
Conclusion
A whole-house repipe does not have to mean a week of chaos. When the work is scoped properly, permitted, pressure tested, and followed through with professional wall restoration, most homeowners are genuinely surprised by how manageable the process is.
Understanding what happens at each stage, from the initial site walk to the final coat of paint, turns a project that feels overwhelming into one that feels entirely straightforward. If your home is showing the signs of failing pipe, low pressure, rusty water, or recurring leaks, knowing what the process looks like is usually the first step toward actually doing something about it.
If you are ready to get a clear picture of what a repipe would involve for your specific home, you can request a repipe solution consultation and get a fixed, no-surprise quote before you commit to anything.