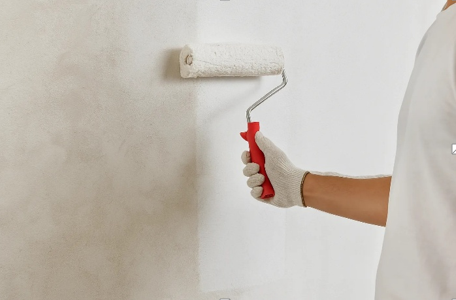
If a finish is only as good as its foundation, your prep decides everything. That’s why professional crews obsess about voorstrijk stucwerk before the first trowel touch. Get it right and plaster bonds evenly, dries consistently, and stays beautiful for years. Get it wrong and you invite patchy suction, hairline cracking, shadowing, and even delamination. At Nourklusbedrijf, we treat preparation as a craft in its own right because it is. Fresh plaster wants a surface that absorbs moisture at a controlled rate. Too thirsty and the plaster “burns” setting before you can lay it in. Too sealed and it skates across the wall like soap on glass. Primer plasterwork solves both extremes by regulating suction and creating a uniform, toothy substrate. The right product also locks down dust, binds weak chalky paint, and improves the mechanical key for your first coat. In short: it makes the wall predictable, which is the condition plaster needs most.
The expensive myths (and why they fail)
A few shortcuts still do the rounds on job sites. Watered down PVA for everything. Skipping primer on “clean” drywall. Relying on a single universal product for brick, concrete, and old emulsion alike. Each of these gambles can cost you the finish. Primer plasterwork is not one size fits all; porosity, pH, contamination, and surface profile all matter. On new gypsum board, you need controlled suction without glazing the paper. On dense cast concrete, you need adhesion plus micro roughness. On previously painted walls, you need stain blocking and dust binding. Different surfaces, different chemistry.
One simple test that tells you the truth
Forget guesswork; do a water drop test. Mist a small area and watch. If the bead vanishes inside 5–10 seconds, suction is high and needs taming. If water sits for a minute, barely moving, the surface is too tight and needs a bonding primer with aggregate or a grip coat. If water darkens the surface unevenly, you’re looking at mixed porosity classic territory for Primer plasterwork to even things out before you skim.
Picking the right primer for common surfaces
New gypsum drywall: Paper faces are absorbent, joints are not classic uneven suction. A quality drywall sealer evens the field so your skim doesn’t snatch on the flats and slide over joints. Here, Primer plasterwork is about consistency, not glue. Old emulsion paint: Sound but chalky paint needs consolidating; glossy paint needs adhesion help. Lightly de gloss the sheen and use a bonding primer with fine aggregate so plaster has tooth. Skipping this step is the fastest way to see blistering or smooth surface slippage. High suction masonry: Brick and porous block drink water. Use a suction control primer and, if necessary, a second light pass in extreme zones. Your goal is measured absorption enough to hydrate, not enough to burn. Dense concrete or precast: Very low porosity plus potential release agents. De grease, abrade if specified, then use a high adhesion grip primer designed for cementitious backgrounds. In this case, Primer plasterwork provides the key you cannot see but will absolutely feel when troweling.
The right sequence (and why each step matters)
Preparation is a sequence, not a shopping list. Rush any link and the outcome suffers. At Nourklusbedrijf we teach apprentices to think in causes and effects: dust weakens adhesion; residues interfere with chemistry; unsealed repairs drink water; pinholes become blisters. A calm, methodical sequence prevents drama on set day.
- Diagnose the substrate: Identify material (gypsum board, cement, brick, existing paint), note repairs, and run the water drop test.
- Decontaminate: Vacuum dust, degrease kitchen areas, and cut away any friable paint; contaminants block the bond that Primer plasterwork is designed to create.
- Repair first, not after: Fill hollows, rake out cracks, and re-secure loose boards. Priming over movement or voids only hides problems for a day.
- Choose a purpose built primer: Suction control for thirsty walls; bonding/grip for dense or previously painted surfaces; stain block where needed.
- Apply with coverage discipline: Respect the spread rate, cross roll for uniformity, and check edges and corners with good light.
- Let it cure: Dry to touch isn’t the same as through cure. Follow the data sheet window before mixing plaster.
Treat this sequence as non-negotiable and Primer plasterwork becomes your insurance policy for a clean, even set.
See also: Why Choose 4K Cameras for Home Surveillance?
Coverage, tools, and drying times (small choices, big results)
Uniform coverage beats thick coverage. Overloading a roller creates sags that dry into slick patches exactly where plaster will misbehave. Use a tight nap roller for smooth surfaces, a microfiber for light texture, and brush in corners and around sockets. Maintain wet edges to avoid lap marks, and work under raking light to spot misses. Respect the manufacturer’s recoat and plaster over windows; most failures we’re called to fix started with impatience. Proper Primer plasterwork needs chemistry plus time.
How primer affects speed on plaster day
Professionals care about time per square meter, not just total hours. Good priming accelerates everything that follows. Trowel pressure stays consistent; your first pass can be wider; your set is predictable, so timing the second and third passes is calmer. That rhythm produces cleaner edges, flatter planes, and less sanding. In other words, Primer plasterwork is not a delay it’s a speed up disguised as preparation. Primers today are mostly low VOC, but ventilation still matters. Mask sockets, protect floors, and control dust with extraction at the source. Never trap moisture behind non breathable layers in damp spaces; choose vapor permeable systems where required. Professional Primer plasterwork balances adhesion with breathability so walls perform well in every season.
What you gain by hiring Nourklusbedrijf
You’re paying for judgment as much as labor. We bring raking lights, moisture meters, and the discipline of documented substrate checks. We match primer chemistry to the wall you actually have, not the one we wish you had. We log coverage, drying windows, and batch numbers so your finish isn’t left to chance. And when unexpected conditions appear, we adapt the plan before plaster is on the hawk.
The bottom line
Perfect plaster starts days before the mix. When you regulate suction, build a reliable key, and remove hidden contaminants, your trowel strokes feel lighter, the set behaves, and the finish looks like glass. Skipping primer might feel faster until you’re chasing problems. Proper Primer plasterwork is the quiet craft behind every wall that looks effortless.
Discover how Nourklusbedrijf can support you with tailor made solutions.